
Navigating the Planning Application Process
- Harper Latter Architects

- Oct 30, 2025
- 16 min read
Updated: Nov 4, 2025
The planning application process is how you get formal consent from your local council to carry out building work. It’s a journey that starts long before any forms are filled out, beginning with some smart preparation to figure out what’s possible for your property.
Crucially, you’ll need to understand if your project needs full planning permission or if it falls under Permitted Development rights, which can sometimes offer a more straightforward path.
Laying the Groundwork for Your Application
Before a single drawing is commissioned, the success of your application really hinges on the prep work. This isn’t about paperwork; it’s about getting to grips with the opportunities and constraints of your property and balancing your vision with what’s realistically achievable in your specific South West London borough.
So many people make the costly mistake of jumping straight into the design phase. The goal here is to build a solid foundation of knowledge first. This informs every decision you make later and gives your application the best possible chance of success right from the start.
Most applications in England and Wales are now submitted online via the Planning Portal. It’s your go-to hub, not just for submitting the final documents but also for initial research and finding your local council’s specific requirements.

Permitted Development vs Full Planning Permission
It’s easy to get these two routes mixed up. Here’s a quick comparison to help you understand which path your project might take.
Aspect | Permitted Development | Full Planning Permission |
|---|---|---|
What is it? | A grant of planning permission from Parliament allowing certain works without a full application. | A formal application to your local council for permission to build. |
Typical Projects | Smaller extensions, loft conversions, and outbuildings that fit within strict size and location criteria. | New builds, larger extensions, projects in Conservation Areas, or anything outside PD limits. |
Process | Simpler and faster. Often requires a Lawful Development Certificate to confirm compliance. | More detailed and longer. Involves submitting plans, reports, and a formal assessment by a planning officer. |
Timeframe | Typically 8 weeks for a Lawful Development Certificate. | Usually 8 weeks for minor applications, but can be 13 weeks or more for larger or complex projects. |
Cost | Lower application fees. | Higher fees, plus potential costs for additional professional reports. |
While Permitted Development can be a great shortcut, the rules are complex and vary between boroughs. It’s always best to get professional advice to confirm which route applies to you.
Understanding Local Precedent
One of the most valuable things you can do early on is a bit of local detective work. Your local council's planning portal is a public archive of every application submitted nearby. Just search your street or postcode, and you’ll uncover a goldmine of information.
Look out for:
Approved Designs: What scale, style, and materials have planners in your area already given the green light to? This gives you a tangible guide.
Refused Applications: Understanding why a neighbour’s project was rejected is just as important. It flags potential pitfalls like overlooking, overshadowing, or designs that were deemed out of character.
Planning Officer Reports: These documents give you direct insight into the council’s thinking, often referencing the specific local policies that sealed the decision.
This research isn’t about copying what next door did. It’s about gathering intelligence to shape a proposal that’s sensitive to its context and far more likely to get a positive reception.
The Role of Professional Expertise
While you can do a lot of this initial digging yourself, bringing an expert on board early is a strategic move that saves time, money, and a whole lot of stress. An experienced residential architect or planning consultant offers an essential layer of professional insight.
Their expertise is invaluable in navigating the complexities of local planning policies, identifying potential issues before they become problems, and translating your vision into a compliant, well-justified design.
An architect won’t just produce the high-quality drawings needed for the submission; they will help you refine your ideas to get the most out of your property while respecting planning constraints. Think of them as your advocate, making sure your application is robust, professional, and persuasive. Our guide offers more advice on how to choose an architect in the UK who is the right fit for your bespoke project.
Building a Persuasive Case for Your Project
With the initial groundwork out of the way, the focus shifts to crafting a compelling and professional proposal. This is where you assemble all the critical documents that your Local Planning Authority (LPA) will scrutinise. It’s about much more than just filling in forms; it's about telling a convincing story about your project.

A successful application is built on clarity, detail, and justification. The real goal is to anticipate the planning officer’s questions and provide clear, professional answers within your submission. You want to make it as easy as possible for them to understand and, ultimately, support your vision.
The Non-Negotiable Architectural Drawings
High-quality architectural drawings are the absolute heart of your application. These aren’t just sketches; they are precise, scaled documents that communicate exactly what you intend to build. Submitting poor-quality or ambiguous drawings is one of the fastest routes to a rejection letter.
Your submission must include several key types of drawings:
Existing and Proposed Site Plans: These show the property boundary, the position of the existing house, and precisely where the new work will be located. They also detail access points, landscaping, and neighbouring properties.
Existing and Proposed Floor Plans: These give a bird's-eye view of each level, clearly showing the layout of rooms, walls, windows, and doors both before and after the proposed changes.
Existing and Proposed Elevations: These drawings show what the building will look like from every angle outside (north, south, east, and west), detailing all the materials, finishes, and the overall design aesthetic.
These documents have to be meticulously accurate. A skilled architect ensures every single detail is correctly represented, leaving no room for a planning officer to misinterpret anything.
Justifying Your Vision with a Design and Access Statement
For many projects, especially those in Conservation Areas or affecting listed buildings, a Design and Access Statement (DAS) is a mandatory part of the application. But even when it’s not strictly required, submitting a well-written one can significantly strengthen your case.
A strong Design and Access Statement does more than just describe your project; it justifies it. It explains the design principles you’ve followed and demonstrates how your proposal enhances the property while respecting its context and complying with local planning policies.
This is your opportunity to explain the 'why' behind your design choices. It should articulate how the proposal responds to the character of the area, addresses any site constraints, and meets relevant policy requirements. For more tailored guidance, you can explore our in-depth architect's guide to achieving planning permission for tips on creating a persuasive narrative.
When Specialist Reports Are Required
Depending on your property's location and the nature of your project, the council might ask for additional specialist reports to support your application. Failing to provide these upfront will only lead to delays, as your application will be deemed invalid until they’re submitted.
Identifying the need for these reports early in the planning application process is absolutely crucial for a smooth journey.
Common reports we see include:
Tree Survey / Arboricultural Impact Assessment: This is essential if your project is near protected trees. An expert will assess the health of the trees and what impact your construction will have on them.
Flood Risk Assessment (FRA): You'll need this if your property is in a designated flood zone. This report details the potential flood risk and outlines mitigation measures to ensure the development is safe.
Heritage Statement: If you own a listed building or are in a Conservation Area, this statement explains the historical significance of the property and shows how your proposals will preserve or enhance its special character.
Daylight and Sunlight Assessment: In dense urban areas, like many parts of South West London, this technical report may be needed to prove that your extension won't unacceptably block light to neighbouring homes.
By proactively commissioning these reports, you demonstrate a thorough and considered approach. You aren’t just presenting a design; you’re presenting a complete, compliant, and robust case that has already addressed all potential planning concerns. This makes the decision-making process for the council as straightforward as possible.
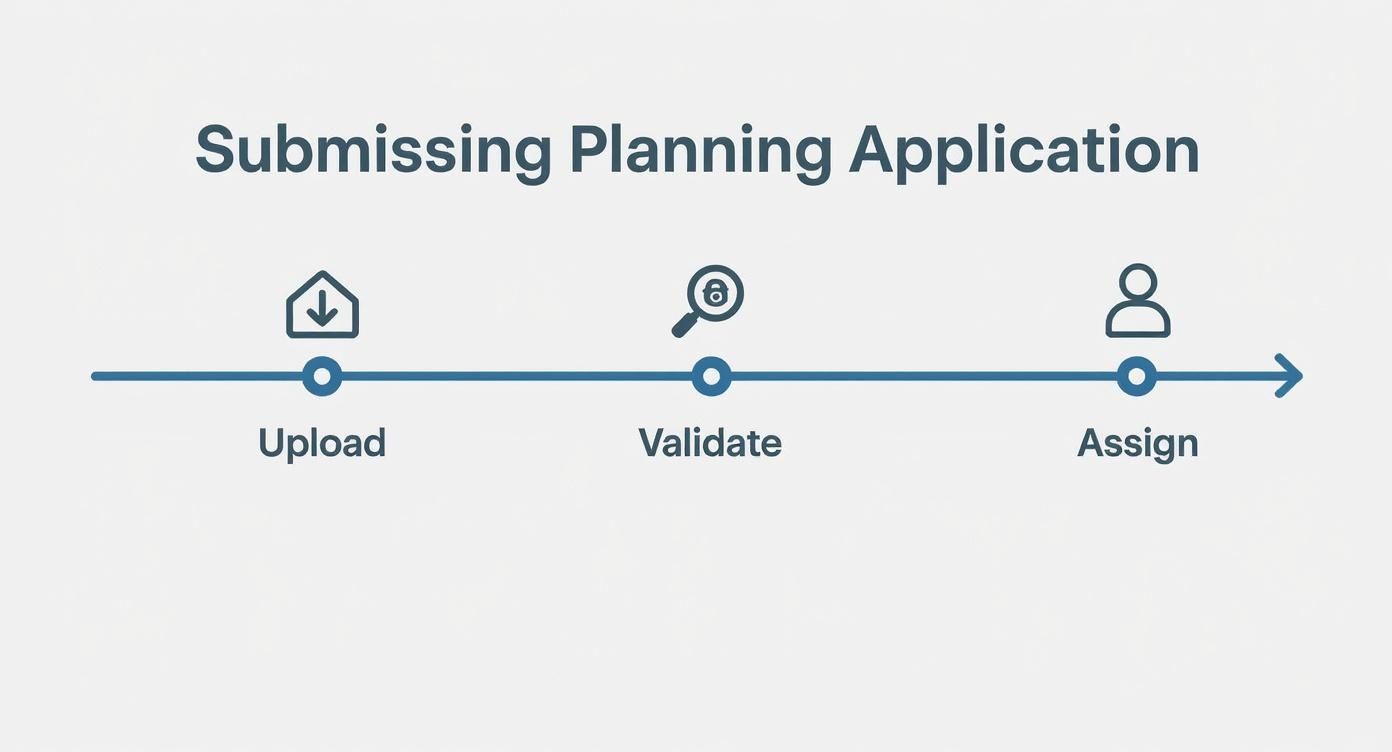
Submitting Your Application and Clearing Validation
Once your drawings are finalised and all the necessary reports are in hand, it’s time for the formal submission. This is almost always done online via the Planning Portal, the national system used across England and Wales to standardise how applications are lodged.
Uploading all your files can feel like you’ve crossed the finish line. But really, it’s just the start of a crucial administrative phase known as validation. This isn't about whether your project is a good idea; it’s a simple procedural check by the council’s admin team to make sure every box has been ticked before a planning officer even sees your proposal.
The All-Important Validation Stage
Think of validation as a gatekeeper. Before your design is even considered on its merits, an administrator will meticulously check that every document has been submitted, every form is filled out correctly, and the right application fee has been paid. Only when they’re happy you’ve met all the national and local list requirements will your application be stamped as ‘valid’.
This is where frustrating, and entirely avoidable, delays often creep in. If anything is missing or incorrect – a scale bar forgotten on a drawing, an unsigned ownership form, the wrong fee calculation – your application is marked ‘invalid’ and sent back. This resets the clock completely. The official eight-week countdown for a decision won’t begin until every single detail is perfect.
An invalid application is one of the most common delays in the planning journey. It has nothing to do with your design, but a simple administrative slip-up can easily add weeks to your timeline.
Common Reasons an Application is Marked Invalid
Having navigated the planning systems of nearly every council in South West London, we’ve seen the same small errors trip people up time and time again. They’re rarely about the architecture itself, but simple procedural mistakes that bring everything to a halt.
Here are the most frequent culprits we see:
Incorrect Fees: Application fees are set nationally, based on the type and scale of your project. A simple miscalculation is an instant red flag for the council.
Missing or Inaccurate Drawings: Every single plan and elevation must be clearly labelled, drawn to a recognised scale, and include a north point. Forgetting just one of these details is enough to get it bounced back.
Ownership Certificates: You must correctly complete the certificate declaring you're the sole owner or have officially notified any other owners. An error here is a surprisingly common problem.
Incomplete Forms: Leaving sections of the application form blank or providing information that contradicts your drawings will cause the council to send it straight back for clarification.
Forgetting a Required Report: If your project needs a Tree Survey or Flood Risk Assessment (as identified in the pre-application stage) and it isn’t included, your submission is incomplete and won't get past the validation team.
Getting this stage right the first time is purely about meticulous organisation. It ensures your application is registered promptly and assigned to a case officer without any needless back-and-forth. This is where having an architect manage the submission adds huge value; we live and breathe this process, making sure every detail is correct before it’s even sent.
Local Planning Authorities (LPAs) are incredibly busy. Recent government data shows they made decisions on around 80,800 applications in just one quarter. While this figure was a slight dip, it proves that councils are processing a huge volume of submissions, making a clean, valid application more important than ever to ensure it moves smoothly through the system. You can dig into more planning application submission trends to see the bigger picture.
What Happens During the Consultation Period
Once your application is validated, the council's clock starts ticking. This kicks off the official eight-week statutory determination period, where the real assessment of your project begins. It’s no longer just about ticking boxes; your design is now under detailed review.
This is the phase of public and professional scrutiny, where your proposal is examined from all angles. It’s not a passive waiting game, though. Behind the scenes, a lot is happening involving your neighbours, various official bodies, and the dedicated planning case officer who will ultimately shape the council’s final verdict.
Knowing what goes on during this time is key to managing your own expectations and being ready for what’s next.
As you can see, getting from submission to validation smoothly is the gateway to this formal consultation and assessment phase.
The Public Consultation Unfolds
As soon as your application is registered, the council launches the public consultation. This is a formal, legally required step designed to give the local community a voice and ensure the process is transparent. For most residential projects in South West London, this means a few things will happen.
First, a site notice – usually a laminated A4 sheet – will be put up outside your property, giving the basic details of your proposal. The council also sends notification letters to your immediate neighbours, inviting them to view the plans on the council’s online portal and submit any comments.
They typically have 21 days from the date on the letter to make their views known.
This is precisely why having a friendly, proactive chat with your neighbours before you even submit is so valuable. It gives you a chance to explain your vision and address concerns personally, long before they receive a formal, and sometimes alarming, letter from the council.
Engaging with Your Neighbours Constructively
Receiving a planning notice out of the blue can feel impersonal and often leads neighbours to assume the worst. By speaking to them beforehand, you can demystify your plans and perhaps even show them sketches to help them visualise the final result.
If a neighbour does raise a concern, listen carefully. Sometimes, a minor tweak to your design—like repositioning a window to prevent overlooking or choosing a different brick to match existing properties—is all it takes to ease their worries and prevent a formal objection. This proactive approach can make the entire planning application process significantly smoother.
The Role of the Planning Case Officer
While the public has their say, your application lands on the desk of a planning case officer. This person is your main point of contact at the council and is responsible for carrying out a thorough assessment of your proposal. They are the professional who will weigh up all the evidence and write a report recommending either approval or refusal.
Their assessment is based on a few core elements:
Local and National Policies: They will scrutinise your plans against the borough’s Local Plan and the National Planning Policy Framework (NPPF). Your Design and Access Statement is crucial here, as it directly argues your case against these policies.
Site Visit: The case officer will almost always visit your property to understand its context. They’ll look at the site, its relationship to neighbouring homes, and the general character of the street.
Consultation Responses: They read every comment submitted, whether it’s from a neighbour, a local residents' association, or a statutory body like the Highways Authority.
The case officer then pulls all this information together to form a balanced, professional judgement. Their final report is the single most influential document in determining the outcome of your application, which makes the quality and clarity of your initial submission absolutely paramount.
To give you a clearer picture, here's a breakdown of what a standard timeline often looks like.
Standard Planning Application Timeline
This table outlines the key stages and typical durations in the planning process once your application has been submitted.
Stage | Typical Duration | Key Activity |
|---|---|---|
Validation | 1-2 weeks | Council checks all documents are present and correct. |
Consultation | 3-4 weeks | Neighbours and statutory bodies are notified and invited to comment. A site notice is displayed. |
Site Visit & Assessment | Weeks 3-6 | The assigned case officer visits the site and reviews the plans against local and national policies. |
Officer's Report | Weeks 6-7 | The case officer drafts their report, summarising all findings and making a recommendation. |
Decision Issued | By Week 8 | The final decision (approval or refusal) is officially issued by the council. |
Remember, this eight-week target is a statutory requirement, but complex cases can sometimes take longer. Keeping communication lines open with your case officer is always a good idea.
What Happens After the Decision Is Made?
After the standard eight-week wait, the council’s official Decision Notice will finally land in your inbox. This document is the formal conclusion of the planning application stage and will clearly set out what you can and can’t do next.
Most decisions fall into one of three camps. Knowing how to respond to each is key to keeping your project moving forward without any unnecessary delays.
Whether the news is good or gives you a new hurdle to overcome, the Decision Notice isn’t the end of the story. It’s simply the start of the next chapter, and having a clear plan is what matters now.
Decoding an Approval with Conditions
Getting an approval is fantastic news, but it’s rarely a simple ‘yes’. More often than not, it will be an approval that is subject to conditions. Think of these as legally binding requirements the council attaches to your permission to make sure the final build is acceptable. They are not optional suggestions; you have to deal with them formally.
These conditions usually relate to the finer details that weren't fully fleshed out in the initial application. For instance, the council might ask for final sign-off on:
Materials: Samples of the exact bricks, roof tiles, or window frames you intend to use, just to ensure they fit in with the local character.
Landscaping: A detailed planting scheme or plans for fences and walls to help soften the visual impact of the new work.
Construction Management: A plan outlining working hours, dust control, and where contractors will park to minimise disruption for your neighbours.
Before any work can begin on site, you must formally ‘discharge’ these conditions by sending the required information back to the council for their approval. It’s a step people sometimes forget, but ignoring it can invalidate your entire planning permission – a costly and completely avoidable mistake.
With permission granted, it’s also the perfect time to shift focus to the next major stage. You can read all about it in our detailed guide to Building Regulations compliance.
Navigating a Planning Refusal
Receiving a refusal can feel like a major setback, but it’s very rarely the end of the road for your project. A well-handled refusal is simply a chance to learn and refine your plans.
The Decision Notice will clearly list the reasons for the rejection, pointing to the specific planning policies your proposal was judged to have failed.
Your first move should be to pick up the phone and have a constructive chat with your planning case officer. This conversation can offer insights that go far beyond the formal wording on the notice. More often than not, they can hint at the specific changes that would make the scheme acceptable to them.
A refusal isn't a final verdict; it's critical feedback. By understanding the council's precise concerns, you can often make targeted tweaks to your design and resubmit an application with a much higher chance of success.
This collaborative approach is almost always the fastest and most cost-effective way forward. A carefully amended resubmission that directly tackles the previous reasons for refusal usually gets a much warmer reception the second time around.
When to Consider a Formal Appeal
What if you and your architect genuinely believe the council’s decision was unreasonable or that they misinterpreted planning policy? In that case, you have the right to appeal. This takes the decision out of the council's hands and passes it to the Planning Inspectorate, an independent national body that will review your case from a fresh perspective.
Lodging an appeal is a much more formal and drawn-out process. An Inspector is assigned to review all the original documents, the council's report, and your statement explaining why you believe the decision was wrong. They will then issue a final, binding decision. This route is best saved for situations where you have a very strong technical argument and any hope of a productive conversation with the council has broken down.
It’s important to be realistic about the timescales. In a recent 12-month period, the UK Planning Inspectorate handled 18,778 appeal decisions. The median time for a decision to be reached was 34 weeks, which shows just how rigorous the system is. You can dig into more data on the complexities of the planning appeals process, and it quickly becomes clear why trying a revised local application is almost always the better first step.
Your Planning Application Questions, Answered
Even the most carefully considered project will throw up questions. As architects who have spent years guiding homeowners across South West London through the planning maze, we've heard them all. Here are the answers to some of the most common queries we get, designed to give you some clarity and confidence.
These questions tend to pop up right at the point where a homeowner’s vision meets the practical, and sometimes frustrating, reality of the system. Getting clear on these points early on is key to setting realistic expectations for your project’s timeline and potential hurdles.
How Long Does a Typical Planning Application Take?
On paper, the official target for a standard householder application is eight weeks. But it’s crucial to know that this clock only starts ticking once the council has formally validated your application.
In reality, the whole journey—from our first design meeting to you getting that decision notice—is usually several months. You’ll need to allow a good four to six weeks just for us to prepare the detailed architectural drawings and all the supporting documents. Once submitted, it can take another week or two for the council's admin team to even register it and kick off that eight-week countdown.
And if your project is a bit more complex, perhaps involving a listed building or a substantial basement dig, the council can extend this decision period to 13 weeks. Sometimes even longer if tricky issues pop up.
What Are the Most Common Reasons for Planning Refusal?
When a planning application gets refused, it almost always boils down to one thing: the council believes the project will have a negative impact on the immediate area. While every project is different, we see the same handful of reasons cropping up time and again on refusal notices from London councils.
The usual suspects include:
Overlooking and Loss of Privacy: A classic red flag. Planners are very sensitive to new windows, balconies, or roof terraces that might look directly into a neighbour’s house or garden.
Overshadowing and Loss of Light: Planners will scrutinise your plans to see if a proposed extension will cast new shadows over next door, robbing them of their daylight and sunlight.
Design Out of Character: This is a big one, especially in conservation areas. A proposal that’s considered too bulky, too modern, or uses materials that clash with the street’s established look is likely to be rejected.
Negative Impact on Highways or Parking: If your project means getting rid of an off-street parking space or is seen as creating a road safety issue, the council’s Highways department will likely object.
A thoughtfully prepared application anticipates these concerns from day one. By working with an experienced architect, you can tackle these potential objections head-on in the design phase, which dramatically boosts your chances of getting a first-time approval.
Do I Have to Tell My Neighbours About My Plans?
Legally, no, you don't have to say a word to your neighbours before you submit. But from our experience, we can’t recommend it enough. It’s probably the single most effective thing you can do to smooth the path ahead.
The council will write to your neighbours anyway as part of the public consultation, giving them 21 days to comment. An official letter landing on their doormat out of the blue can feel cold and often sparks worry, leading to objections that might be based on a simple misunderstanding.
A quick, friendly chat over the fence can work wonders. Show them some sketches, explain what you’re hoping to achieve, and really listen to what they have to say. This simple courtesy can defuse potential issues before they even become issues and often stops formal objections from ever being written.
What Is a Lawful Development Certificate?
A Lawful Development Certificate (LDC) is often mistaken for planning permission, but it’s a totally different beast. An LDC is a formal legal document from the council confirming that your project is lawful and doesn't need planning permission because it falls under your Permitted Development rights.
You aren’t applying for an LDC to get permission; you’re applying to prove you already have it under these national rules. It gives you absolute legal certainty that your loft conversion or rear extension is compliant. This isn't just for your own peace of mind—it's something your solicitor will almost certainly demand when you decide to sell your home in the future.
At Harper Latter Architects, we live and breathe this stuff. We guide our clients through every single stage of the planning process, from figuring out what’s possible on day one to celebrating that final approval. If you're planning a project in South West London, we have the expert architectural insight needed to bring your vision to life.
Take a look at our architectural services and see how we can help you get started.
Comments