
Cellar Conversions Cost A London Homeowner's Guide
- Harper Latter Architects

- Feb 7
- 17 min read
When you’re thinking about the real cost of a cellar conversion, a straightforward project in an existing space in London will typically start from £900 to £1,400 per square metre. This figure gets you a structurally sound, dry space, but the final investment really hinges on your vision and what we're starting with.
Unpacking the Real Cost of a London Cellar Conversion
Embarking on a cellar conversion is one of the smartest ways to unlock valuable new living space without extending your property’s footprint. It’s a particularly savvy investment in sought-after areas of South West London like Wimbledon, Richmond, and Chiswick, where every square metre counts.
But before you start imagining a new home cinema or gym, it’s crucial to get a firm grip on the potential costs. This guide is designed to move beyond vague estimates and give you a realistic picture of the investment required for your London home. At Harper Latter Architects, we believe a well-informed client is an empowered one, and our job is to guide you through every financial decision with complete transparency.
Your Financial Starting Point
The first, and most critical, phase of any conversion is creating a dry, structurally sound 'shell'. This involves foundational work like excavation (if needed), adding structural supports, comprehensive waterproofing (often called 'tanking'), and installing basic insulation and utility connections. Unsurprisingly, these elements form the bulk of the initial expense.
For homeowners in South West London, the cost for this core work is often in line with national averages but can be nudged higher by local factors. Industry data shows that converting an existing cellar can cost between £900 and £1,400 per square metre.
Let's put that into perspective. For a typical 40m² cellar in a Victorian terrace, you’re looking at a core construction budget of £36,000 to £56,000, and that’s before professional fees and VAT.
To give you a clearer idea, here’s a quick summary.
Estimated Cellar Conversion Costs at a Glance
This table outlines the typical cost brackets for converting an existing cellar shell in South West London. Please note these figures are for the construction of the shell and basic fit-out, excluding VAT and professional fees.
Conversion Type | Average Cost per m² (GBP) | Estimated Total for a 40m² Cellar (GBP) |
|---|---|---|
Basic Conversion (e.g., utility, storage) | £900 – £1,100 | £36,000 – £44,000 |
Mid-Range Finish (e.g., playroom, home office) | £1,100 – £1,400 | £44,000 – £56,000 |
High-End/Luxury Fit-Out (e.g., cinema, gym) | £1,400+ | £56,000+ |
This budget effectively gives you a dry, habitable space—a blank canvas ready for the next stage. It’s from this point that your vision, whether it's a family room, a state-of-the-art gym, or a quiet home office, can truly be realised.
At Harper Latter, we don’t see the budget as a limitation. We see it as the framework for creativity. By understanding the core costs from day one, we can strategically allocate funds towards the high-end finishes and bespoke features that will truly elevate your home and lifestyle.
From this baseline, we can then layer in the costs for our architectural services, planning applications, and the final fit-out, which covers everything from flooring and lighting to custom-built joinery. Our expertise in creating stunning basement extensions ensures that every pound is invested wisely, turning a dark, damp space into a beautiful and functional part of your home.
Key Factors That Drive Your Final Project Cost
While a cost per square metre gives you a useful ballpark figure, it really doesn't tell the whole story. The final number on your invoice will be shaped by the unique character and quirks of your property. Getting your head around these variables is the key to creating a realistic budget for your cellar conversion.
Think of it like this: two terraced houses on the same South West London street might look identical from the front door, but beneath the floorboards, one could have solid foundations and dry soil, while its neighbour is battling a high water table and crumbling Victorian brickwork. These underlying conditions completely change the scope and complexity of the job.
Without a doubt, the initial state of your cellar is the single biggest factor influencing the final cost. A space that's already relatively dry with decent head height is a much simpler starting point than a cramped, damp, and forgotten void.
The Condition of Your Existing Cellar
The first thing we do on any project is a thorough assessment of what we're actually working with. A professional survey uncovers the specific challenges your space presents, which then translates directly into the time, materials, and labour required.
Here are the main things we're looking for:
Ceiling Height: Is there enough headroom to create a genuinely comfortable living space? If not, we’ll need to lower the floor level and underpin the existing foundations. This is a major structural undertaking that adds a considerable amount to the budget, but it's often essential to make the space truly usable.
Existing Damp and Water Ingress: Just how damp is it? Any evidence of standing water, mould, or efflorescence (those white, salty deposits on the walls) tells us we're going to need a seriously robust waterproofing solution.
Structural Integrity: Are the existing walls and foundations sound? We have to be certain the structure can support the conversion and any new loads we introduce.
Access: How will builders and materials get in and out? Tight access, which is common in period London homes, can increase labour costs and add logistical headaches.
Waterproofing: The Heart of the Conversion
Keeping a space that’s below ground level completely dry is non-negotiable, and it represents a critical slice of the budget. There are two main ways to do it, and choosing the right one for your property's specific conditions is paramount for long-term success.
This infographic breaks down the main cost components, showing how the core build, professional fees, and VAT all contribute to the final investment.
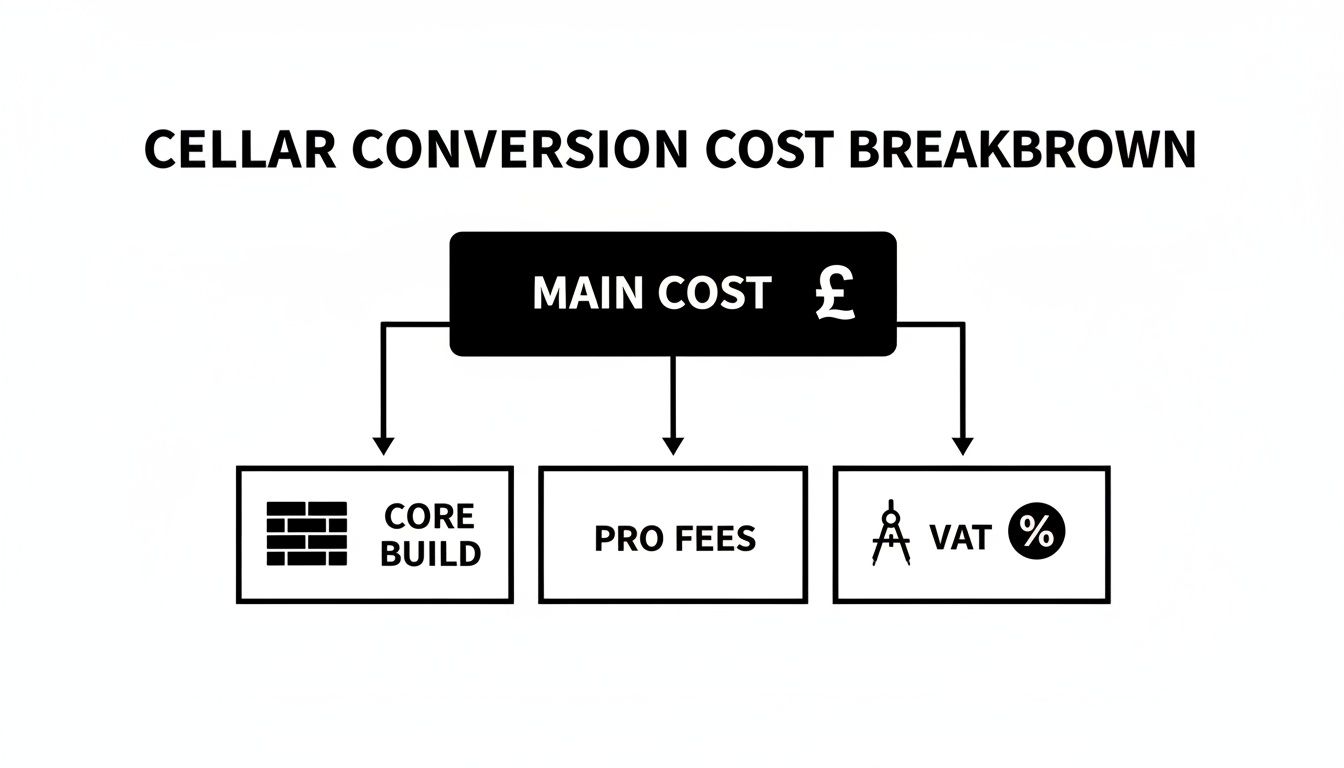
As you can see, the core construction—which includes vital elements like waterproofing—forms the largest chunk of your overall cellar conversions cost.
Here's a quick look at the two main approaches:
Waterproof Render ('Tanking'): This is the traditional method. It involves applying a waterproof cement-based slurry directly onto the masonry, essentially creating a sealed, waterproof box. While it can be effective in some situations, it's vulnerable to failure if the building settles or if hydrostatic pressure from groundwater gets too high.
Cavity Drain Membrane System: This is the modern, preferred solution for almost all high-quality conversions today. A dimpled plastic membrane is fixed to the walls and floor, creating a small air gap. Any water that finds its way through the original wall simply runs down inside the cavity, is collected in a hidden drainage channel, and is safely pumped away by a sump pump. It cleverly manages water rather than trying to block it, which makes it exceptionally reliable.
Choosing a waterproofing system isn't about finding the cheapest option; it's about investing in the correct one. A cavity drain membrane system often costs more upfront but provides superior protection and peace of mind, safeguarding your entire investment against future water damage.
While a cavity drain system might increase the initial budget by 15-25% compared to basic tanking, its reliability is why it has become the industry standard for creating truly habitable and valuable living spaces. Factoring this in from the very beginning ensures there are no costly, damp surprises down the line.
Budgeting for Professional Fees and Planning Permissions
The construction quote is the big-ticket item, the number everyone focuses on, but it’s far from the whole story. To take your cellar conversion from a great idea to a fully realised, legally sound part of your home, you need a team of specialists in your corner. These aren't optional extras; they're fundamental investments that protect your project's quality, safety, and legal standing.
Getting your head around these fees early on is the key to a realistic budget and avoiding nasty surprises later. For a typical cellar conversion in South West London, a good rule of thumb is to set aside an additional 15-20% of your total construction cost to cover all the professional services. This ensures every technical and legal box is ticked by an expert.
Architect's Fees
Think of your architect as the strategic and creative lead for the entire project. Their job goes far beyond just drawing up plans. They are the ones who translate your vision into a design that is beautiful, practical, and, crucially, compliant with all regulations. They handle the planning complexities, bring in other professionals when needed, and make sure the final result is built to the highest standard.
Architect’s fees are usually calculated as a percentage of the total construction cost, typically falling between 10-15%. So, for a project with a £60,000 build cost, you’d be looking at £6,000 to £9,000. This fee covers a whole suite of services, from initial sketches and highly detailed technical drawings to managing the builder tender process and keeping an eye on the work as it happens on-site.
An experienced architect doesn't just design a space; they add value at every stage. By optimising the layout, specifying the right materials, and solving problems before they arise on-site, their involvement often saves you money in the long run and maximises the return on your investment.
Structural Engineer's Fees
A cellar conversion is a serious piece of structural work. Whether you're lowering the floor to gain precious ceiling height or just turning a damp space into a dry, habitable one, a structural engineer is non-negotiable. They are there to guarantee the absolute integrity of your home’s foundations, and their calculations are a critical part of getting Building Regulations approval.
The engineer will design all the necessary steelwork (like RSJs), specify the foundation requirements, and produce the detailed calculations that your building team will follow to the letter. For most cellar projects, you can expect to budget between £1,500 and £3,000 for their expertise. It’s a fixed investment in the safety and longevity of your property.
Party Wall Agreements and Surveyors
If your home is terraced or semi-detached—as so many properties in Wimbledon and Richmond are—the Party Wall Act 1996 will almost certainly come into play. This bit of legislation is there to protect both you and your neighbours from any disputes or damage that could come from working on a shared wall.
To comply, you must serve a formal notice to your neighbours. If they give their consent, you might not have any further costs. However, it's quite common for them to dissent or ask for their own surveyor to oversee things, and you'll be responsible for the fees of both your surveyor and theirs.
Here’s how those costs can break down:
Serving Notices: Your surveyor will charge a fee for getting the legal notices drafted and served correctly, usually £150-£250 per neighbour.
Schedule of Condition: This is a detailed report documenting the state of your neighbour's property before any work begins. Expect to pay around £500-£800.
Party Wall Award: If surveyors for both sides get involved, drawing up the legal 'Award' can cost £1,200 to £2,000 per neighbour.
As you can see, these costs can add up, so it's wise to budget somewhere around £1,500 to £4,000 for Party Wall matters. A friendly chat with your neighbours early on can sometimes help make this a much smoother process. To see how we integrate these steps into a seamless project, you can learn more about our comprehensive architectural services and how our team manages these complexities for you.
The Price of Luxury: Creating Your Dream Space
Once the structural work is complete and the waterproofing is signed off, you’re left with a dry, sound, blank canvas. This is the exciting part—where the vision for your cellar conversion truly comes to life. It’s the point where we move beyond functional space and begin crafting a defining feature of your home. For many of our clients across South West London, this is a chance to invest in amenities that genuinely enhance their lifestyle, from a dedicated home cinema to a climate-controlled wine room.
The final fit-out is where the budget can see the most dramatic variation, driven entirely by your personal tastes and ambitions. A simple, well-lit playroom will have a very different price tag to a fully soundproofed media room with tiered seating and a professional-grade projector. At this stage, generic 'per square metre' costs become less relevant; it’s all about the detailed breakdown of specialist features and high-end finishes.

This isn’t just about spending more, either. It’s about smart, targeted investment in features that deliver daily enjoyment and add tangible, lasting value to your property.
From Home Cinema to Personal Gym
Creating a dedicated leisure space is one of the most popular aspirations for a cellar conversion. The natural sound insulation of a subterranean room makes it perfect for activities that might otherwise disturb the rest of the household. But achieving a truly high-end result requires specialist planning and construction that goes far beyond standard fit-out costs.
Here are some of the most sought-after luxury additions and what drives their cost:
Home Cinema: A basic setup might just involve a large screen and good speakers. A true cinema experience, however, requires acoustic insulation (£3,000 - £7,000), tiered flooring for authentic seating (£2,000+), specialist lighting controlled by a smart system (£2,500+), and bespoke cabinetry to conceal all the tech.
Personal Gym: The biggest cost here is often the reinforced flooring needed to handle heavy weights, plus specialist rubber matting (£50 - £100 per m²). You’ll also want excellent ventilation and air conditioning—which can add £4,000 - £8,000 to the budget—not to mention full-length mirrors and integrated storage.
Climate-Controlled Wine Room: For the serious collector, this is the ultimate statement piece. A bespoke wine cellar needs specialist climate control systems to manage temperature and humidity perfectly, which alone can cost upwards of £10,000. Add custom racking, insulated glass walls, and atmospheric lighting, and it's clear why this is a significant, but hugely rewarding, investment. You can discover more about creating a dedicated space for your collection by reading about our approach to designing the perfect wine room.
Investing in a high-specification feature like a home gym or wine cellar is about more than just the initial outlay. It's about creating a space that is perfectly calibrated for its purpose, ensuring it performs flawlessly and adds a unique selling point that will significantly elevate your property's market appeal.
The Impact of Bespoke Finishes
Beyond the headline features, it’s the choice of materials and the quality of the finishing touches that truly define a luxury space. This is where an architect’s eye for detail makes a profound difference, transforming a well-built room into an exceptional one.
Take bespoke joinery. Off-the-shelf storage is functional, but custom-built cabinetry, media units, or library shelving designed specifically for the space will maximise every inch and create a seamless, integrated look. While a simple MDF unit might cost £1,500, a handcrafted equivalent in oak or walnut with integrated lighting could easily reach £8,000 - £15,000 or more.
Lighting is another powerful tool. A standard grid of downlights gets the job done, but a sophisticated, layered lighting scheme is transformative. This means combining different light sources to create mood, highlight architectural features, and define zones within an open-plan space.
A well-designed scheme could include:
Architectural lighting set into ceiling coffers or wall recesses.
Task lighting focused on specific areas like a bar or desk.
Accent lighting to draw attention to artwork or key features.
Smart controls allowing you to change scenes at the touch of a button.
Implementing a scheme like this can add £5,000 to £12,000 to the project, but the impact it has on the final atmosphere is immeasurable. Ultimately, these details are what elevate the cellar conversions cost from a simple build to a true luxury addition.
Mapping Your Project Timeline and Payment Milestones
A well-managed cellar conversion runs on a clear timeline and a predictable payment schedule. Understanding the roadmap, from the first sketch to the final handover, is key to feeling in control of both the project and your budget. By linking each phase to expected payments, you can avoid surprises and manage your cash flow effectively.
At Harper Latter Architects, we follow the structured RIBA (Royal Institute of British Architects) Plan of Work. This isn't just industry jargon; it’s a proven framework that breaks down complex builds into logical, manageable stages. It provides clarity and accountability at every step, turning what could be an overwhelming process into a series of achievable milestones.
For a typical cellar conversion in London, you can expect the entire project to take anywhere from 6 to 12 months from our initial design meeting to you enjoying your new space. This timeframe really depends on the project's complexity and how smoothly the approvals process goes.
Stage 1: The Design and Approvals Phase
This is where your vision truly takes shape and all the critical groundwork is laid. It’s less about digging and building, and more about meticulous planning. This stage typically lasts between 3 to 5 months.
Interestingly, the timeline here is often dictated by external bodies like your local council and even your neighbours.
Initial Concept & Developed Design (4-6 weeks): We’ll work closely with you to develop a design that perfectly matches your brief and budget. This stage finishes with a complete set of detailed drawings, ready to be submitted for planning.
Planning Permission (8-12 weeks): Once we submit the application, the local authority usually takes around eight weeks to come back with a decision, although complex cases can sometimes take longer.
Party Wall Agreements (4-12 weeks): This process runs alongside the planning application. The timeline can vary hugely depending on your neighbours' response. A straightforward consent is very quick, but if surveyors need to be appointed, it will add several weeks to the clock.
Our architectural fees are invoiced in instalments as we complete these key design and administrative milestones. This ensures you only pay for work as it’s delivered.
Stage 2: The Construction and Fit-Out Phase
Once all the permissions are in place and a contractor has been appointed, the on-site work can finally begin. For a standard cellar conversion, this construction phase generally takes 3 to 6 months.
This is the point where the bulk of your cellar conversion cost is paid out, typically directly to your building contractor based on a pre-agreed schedule. A typical payment structure might look like this:
Mobilisation Fee: A deposit of around 5-10% is often required upfront. This allows the contractor to order initial materials, arrange scaffolding, and get the site set up.
Structural Works: Payments are made upon completion of major structural stages, like the excavation, underpinning, and waterproofing. These are significant, tangible milestones.
First Fix & Plastering: Another payment is due once the internal walls are built, the initial electrics and plumbing are installed, and the space is fully plastered.
Second Fix & Finishes: This covers the final layer of detail – installing joinery, laying floors, fitting lighting, and all the decoration.
Practical Completion: The final payment (minus a small 'retention') is made when the work is complete and ready for handover. This retention, usually 2.5-5%, is held back for a defect liability period of 6-12 months just in case any minor issues crop up.
A structured payment schedule tied to tangible progress on-site is essential. It protects your investment and ensures the contractor is motivated to complete each phase to the agreed standard before receiving payment.
This phased approach gives you maximum visibility and control over your investment. By understanding the timeline and its corresponding financial milestones, the entire process becomes a clear, predictable, and even enjoyable journey.
How a Cellar Conversion Boosts Your Property Value
Thinking about a cellar conversion purely in terms of cost is missing the bigger picture. It’s not just an expense; it’s one of the smartest financial moves you can make for your London home. This is a strategic investment that pays off twice: first in immediate lifestyle improvements, and again in long-term financial growth.

In a market as competitive as South West London, adding square footage is the most reliable way to increase your home’s market price. A well-designed, properly executed conversion can boost your property’s value by 10-20%. That’s an impressive return that often dwarfs the initial outlay, especially in areas where extending outwards or upwards simply isn’t an option.
Maximising Your Return on Investment
Of course, the type of space you create has a huge impact on the final valuation. While any dry, functional room adds value, some additions give you a much stronger return. Estate agents across affluent postcodes will tell you that certain features are always at the top of a buyer’s wish list.
To really maximise your property's appeal and financial return, these are the high-impact options to consider:
An Additional Bedroom with En-suite: This is almost always the most valuable addition you can make. Adding another bedroom, especially with its own bathroom, can push your property into an entirely different price bracket, catching the eye of growing families desperate for more space.
A Self-Contained Annexe: Think bigger. Creating a space with its own entrance, kitchenette, and bathroom offers incredible flexibility. It can serve as a guest suite, a flat for a nanny, or even generate rental income, making it a powerful selling point for future buyers.
A Dedicated Home Office or Gym: Since the shift in working habits, purpose-built spaces for work and wellness have become a major priority. A well-designed home office or gym shows a modern understanding of lifestyle needs and instantly adds a premium feel.
What makes a cellar conversion so unique is that it adds valuable square footage without altering your home's external appearance or, crucially, sacrificing any garden space. This is an incredibly powerful way to increase value in Conservation Areas or on tight urban plots where other extensions are impossible.
Quality Is the Key to Value
It’s vital to understand that the return on investment is directly tied to the quality of the work. A dark, damp, or poorly finished basement will add very little and could even put buyers off. This is precisely why professional design and execution are non-negotiable.
Features that signal a high-quality conversion and justify a much higher valuation include:
Excellent Natural Light: Clever use of light wells, walk-on structural glass, and well-placed glazing is what transforms a "cellar" into a true "lower-ground floor."
Good Ceiling Height: The space must feel generous and airy, not cramped. Achieving a good head height is essential for it to be considered premium living space.
Seamless Integration: The new level should feel like a natural part of the main house. This means a high-quality staircase, consistent flooring, and design details that flow from the ground floor downwards.
When all is said and done, a professionally designed cellar conversion is far more than just a home improvement. It’s a calculated investment that unlocks your property’s hidden potential, enhancing its value for many years to come.
Of course. Here is the rewritten section, crafted to sound completely human-written and natural, following the style and tone of the provided examples.
Your Questions Answered
When you’re considering a project as significant as a cellar conversion, it’s only natural to have questions. We get asked about the practicalities all the time, so we’ve put together some straightforward answers to the most common queries we hear from homeowners across South West London.
Do I Really Need Planning Permission for a Simple Conversion?
This is often the first question people ask, and the answer can be welcome news. If you are simply converting an existing cellar and not changing the external appearance of your home, you typically won't need full planning permission.
However, you will always need to comply with Building Regulations. Think of these as the rulebook for making sure your new space is safe, warm, and healthy. They cover everything from structural stability and fire safety to ventilation and damp-proofing, ensuring your cellar is genuinely habitable.
It’s also crucial to remember that if your property is listed or sits within a Conservation Area—as many homes in Wimbledon and Richmond do—other consents will almost certainly be required. It’s always best to have an architect confirm the exact requirements for your specific property before you get started.
What's the Difference Between Tanking and a Cavity Drain Membrane?
These are two different philosophies for keeping a basement dry, and the cost reflects that. Tanking is the traditional method, where a waterproof cement slurry is applied directly to the walls, creating a barrier to physically hold back water.
A cavity drain membrane system works more intelligently. We line the walls with a dimpled plastic sheet, which creates a small air gap. Any water that gets through the wall simply trickles down behind the membrane into a hidden drainage channel, where it’s quietly pumped away. While tanking might seem cheaper up front, membrane systems are far more reliable and are the modern industry standard.
You can expect the cellar conversions cost for a full membrane system to be around 15-25% higher than basic tanking. But for the peace of mind and a truly dry, usable living space, it's an investment we almost always recommend.
How Much Should I Set Aside for VAT and Professional Fees?
A good rule of thumb is to budget an additional 15-20% of the construction cost to cover your professional team. This will include your architect, a structural engineer, and any party wall surveyors needed to get your project off the ground.
Once you have that total (build cost + fees), you then need to add VAT, which currently stands at 20%.
For example, let's say you have a construction budget of £50,000. Your fees would likely be between £7,500 and £10,000, bringing the subtotal to around £60,000. With VAT at 20%, another £12,000 is added, making your final estimated investment roughly £72,000. At Harper Latter Architects, we believe in total clarity, which is why we provide a detailed fee proposal right at the start.
Ready to unlock the hidden potential beneath your home? The team at Harper Latter Architects can provide a detailed appraisal of your property and a clear, transparent breakdown of your potential cellar conversions cost.
Comments