
Air Source Heat Pump Sizing for UK Homes

Three quotes land in your inbox for the same house, one at 6 kW, one at 9 kW, and one at 13 kW. The numbers look tidy, but they're not the decision. The question is whether the building, the emitters, and the flow temperature line up so the heat pump can carry the load without turning into an expensive compromise.
That question is especially sharp in South West London, where a Victorian terrace in Wimbledon, a 1930s semi in Wandsworth, and a post-war detached house in Surrey can all need very different answers. Conservation constraints, older radiators, loft conversions, and fabric upgrades can all move the final size. The right approach is a room-by-room heat-loss calculation, then a check that the chosen unit can meet the demand at the site's design outside temperature and the intended flow temperature, rather than a guess based on floor area or boiler replacement habits. The Energy Saving Trust's Green Heat Toolkit is explicit that sizing should start with property heat loss and be matched to the emitters and operating temperature, with the heat pump selected to meet 100% of the house's heat demand at the design outside temperature. Energy Saving Trust sizing guidance
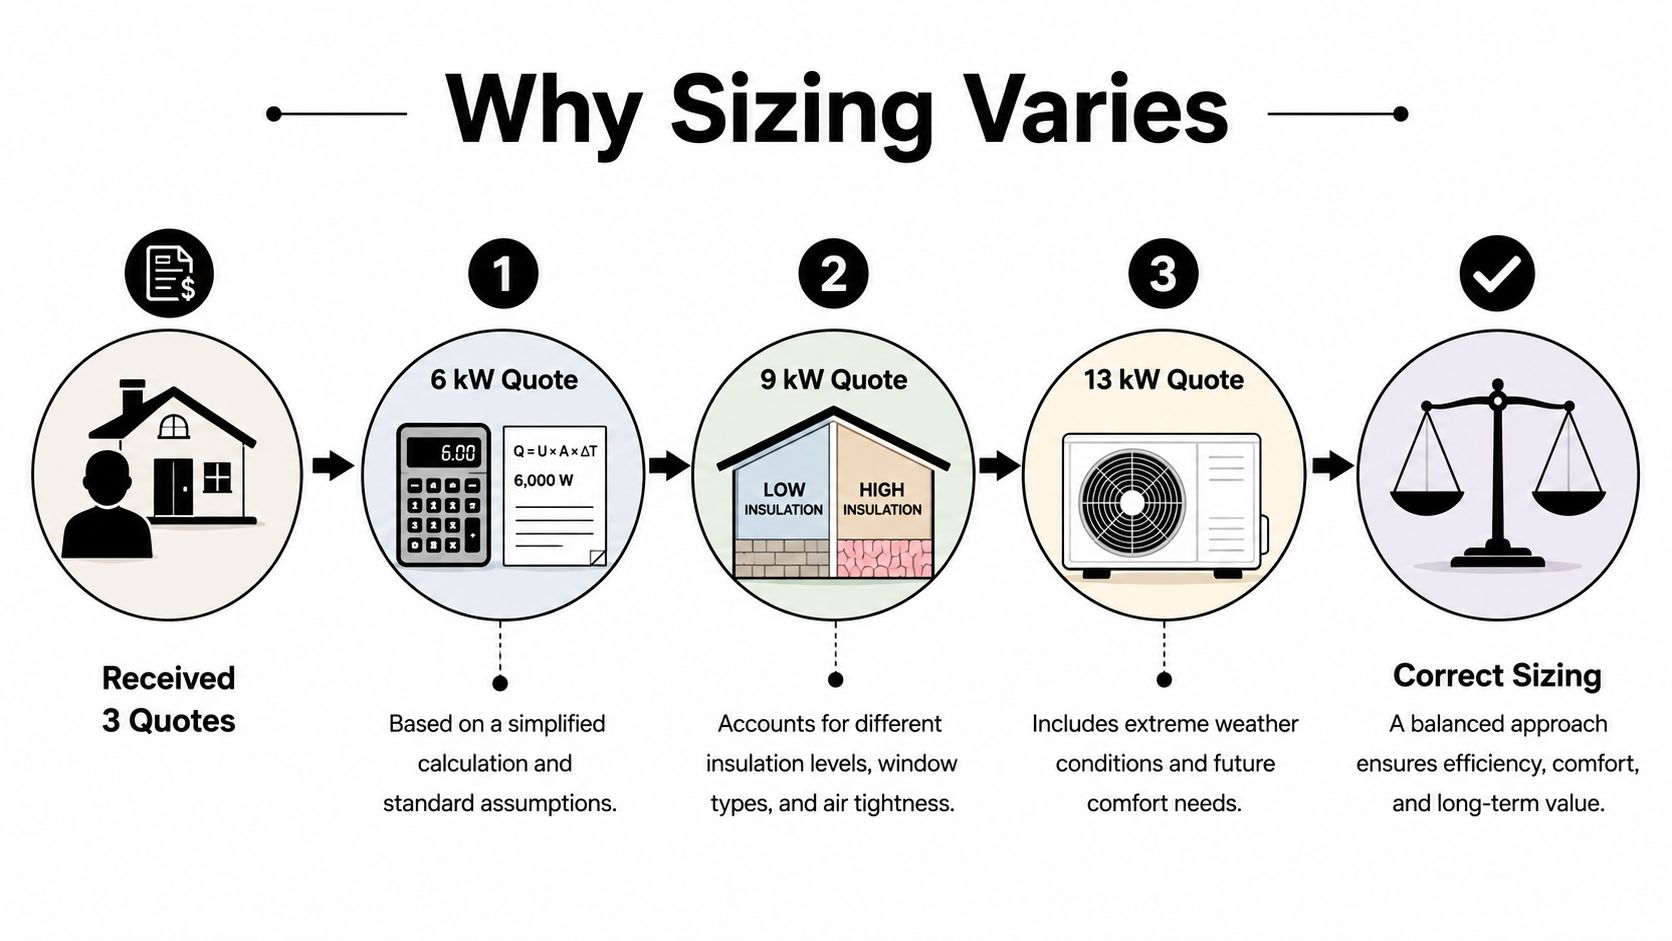
What follows is the workflow I'd expect to see on a serious retrofit: how the heat loss is built up room by room, how flow temperature changes the shortlist, how emitters can rescue or sink the design, and how to judge whether a quote is fit for a heritage house. If you're comparing contractors, it'll give you the right questions to ask. If you're already deep in design, it'll help you push back when a proposal feels too big, too small, or just too vague.
Why Sizing Is the Hardest Decision in a Heat Pump Project
A homeowner in Wimbledon can collect three quotes for the same semi-detached house and still feel as if each contractor has priced a different building. In practice, they often have. One assumes the house stays unchanged, one assumes future insulation works, and one adds generous margin to avoid a call-back on the coldest night of the year.
air source heat pump sizing sits at the junction of fabric, emitters, and climate. Get that junction wrong and the whole retrofit starts to wobble. The Energy Saving Trust's guidance is clear that UK sizing should begin with a room-by-room heat loss calculation, then a design flow temperature should be chosen, and the heat pump should be selected so it can meet the home's demand at the design outside temperature. If the calculated load falls between two models, the guidance says to pick the slightly higher maximum output. Energy Saving Trust sizing guidance
What makes retrofit homes tricky
Older London housing stock rarely behaves like a brochure example. A Victorian terrace in Wimbledon may hold its front rooms reasonably well, then lose heat through the rear elevation, the loft, and the original windows. A 1930s semi can look straightforward on paper, then require a very different emitter strategy once the insulation and airtightness are properly checked. The result is that the biggest risk is often not the heat pump itself, but the assumptions made before anyone has looked carefully at the building.
Practical rule: if an installer can't show you the heat-loss document, they have not finished the sizing conversation.
That matters because the usual mistake is to chase the biggest unit that will fit the budget or the plant room. Oversizing can reduce efficiency and comfort, while undersizing can push the system into backup heating. UK guidance also links sizing to the property's emitter types and operating temperature, which is exactly where many retrofits rise or fall. Older radiator systems, solid walls, and fabric upgrades in heritage homes often determine the final size more than the floor area ever will. Energy Saving Trust sizing guidance
What a competent workflow looks like
A serious installer or design team should be able to explain the load, the design temperature, the chosen flow temperature, and why the selected machine fits the house as a system. The Canadian sizing guide makes the same point in broader terms, saying the building's thermal envelope, air leakage, glazing orientation, and internal gains all matter before a unit is selected. It also warns against oversizing for the coldest hour, because that can increase short-cycling and reduce seasonal efficiency. Natural Resources Canada sizing guide.pdf)
The same level of discipline should extend to the building itself. If the team has not checked how the house leaks, the size call is still provisional. A simple air-tightness test can reveal whether draughts, chimneys, and junctions are making the load look worse than it needs to be, which is often the difference between a tidy design and one that struggles in service.
For a homeowner, the benefit is straightforward. You can tell the difference between a quote that is carefully calculated and one that is merely conventional. In a planning-sensitive area, that confidence saves time, money, and awkward redesigns later.
Calculating Heat Loss Room by Room
A proper heat-loss calculation starts at room level and works back through the envelope. The load should be built from each room's wall area, roof area, floor area, glazing, U-values, ventilation, infiltration, and internal gains, then checked against the design outside temperature and the intended flow temperature. British and Canadian guidance both expect installers to use approved calculation methods rather than rules of thumb, then size the equipment to suit the result. CEE sizing considerations
What the spreadsheet should capture
A Wimbledon 1930s semi with a loft conversion is a useful example because the rooms with the highest heat loss are rarely the biggest. The bathroom under the rooflight may drive the peak load because of glazing, exposure, and high ventilation losses. A north-facing kitchen can do the same, especially if the rear wall is solid and the door opens into a draughty circulation space.
The calculation should show how each room contributes to the total, not just the whole-house figure. That includes the effect of air leakage, and where relevant the losses through ductwork. The Canadian guide is clear that load calculations need to account for envelope performance, infiltration, solar gains, latent load, and duct losses where relevant, because all of those affect the final plant choice. Natural Resources Canada sizing guide
A quick sanity check is to ask whether the installer's numbers change when the fabric changes. If the proposed size stays identical before and after loft insulation, the calculation is not tracking the building properly.
What to do with phased retrofit rooms
Single-glazed rooms and solid-wall rooms need special attention in staged projects. If those elements are staying for a year or two, the heat-loss figure should reflect that condition, while the future upgrade path is still noted. A SAP assessor or a detail-led retrofit designer can help here, because the numbers need to stay coherent across the whole envelope, not just the heating plant.
An on-site survey will always tell you more than an online calculator because the survey can see the conditions the spreadsheet depends on. That is why I treat any quote that arrives without a heat-loss document with caution. If you want to see how airtightness testing sits within the wider envelope picture, this note on air-tightness testing is a useful companion.
What to ask for before you proceed
Room schedule: Ask for room-by-room losses, not just a total kW figure.
Assumptions: Check the stated U-values, ventilation approach, and infiltration rate.
Comfort check: Confirm that both heating and cooling loads have been reviewed, as British and Canadian guidance recommends. CEE sizing considerations
Final sign-off: Make sure the quote is tied to the survey, not just to a generic property type.
Design Flow Temperature and the Climate Question
A heat pump is sized around kilowatts at a specific flow temperature and a specific outdoor design condition. Change either of those inputs, and the shortlist changes with them. A unit that looks suitable on paper can become a poor fit once the emitters are asked to run cooler or the winter design temperature is set for London rather than for a colder part of the country.
Why flow temperature changes everything
Lower flow temperatures usually improve heat-pump efficiency, provided the emitters can still give the rooms enough heat. In retrofit practice, 35°C is the target to aim for where the radiators or floor build-up allow it. 45°C is often the realistic compromise in older radiator systems, while 55°C+ is usually reserved for difficult cases where the fabric or the emitters have not yet been brought up to the same standard. That choice affects more than running cost. It changes which machines can cover the load without depending too heavily on backup heat.
The Energy Saving Trust guidance ties sizing to the chosen operating temperature and says the unit needs to meet the house's demand at the design outside temperature. The Pacific Northwest National Laboratory's cold-climate guidance points in the same direction, recommending Manual J followed by Manual S, with equipment selected to meet the heating and cooling targets without excessive cycling. Energy Saving Trust sizing guidance PNNL cold-climate sizing
In South West London, the design condition is about the house and the emitter strategy, not about choosing a Scandinavian-style unit because it looks strong on paper.
The London climate lens
South West London does not spend long at extreme winter temperatures, so the design outside temperature is typically around -2°C to -3°C rather than the harsher conditions seen further north. That matters because a unit selected against the wrong climate assumption can look larger than needed, then spend most of the year cycling below its efficient operating range.
Two houses with the same heat loss can still need different plant decisions if the emitter strategy is different. A 6 kW load at 35°C flow and -2°C external is a different problem from a 9 kW load at 50°C flow and -2°C external. The first can often be served by a more compact, better-modulating machine. The second may need a radiator strategy change before the heat pump size is even worth debating.
Questions worth asking the installer
At what flow temperature is the quoted capacity measured?
What design outside temperature are you using?
Will the unit meet the heating load at that exact condition, or only under a milder assumption?
How much short-cycling do you expect in shoulder seasons?
That last question matters because a heat pump works best when it stays in its efficient operating range for most of its run hours. Oversizing for the coldest hour can push it away from that range for the rest of the year.
Matching Emitters to Flow Temperature
The emitter conversation is where the design stops being theoretical and starts being about comfort in occupied rooms. A heat pump can only work with what the emitters can release into the house, so the radiator schedule matters as much as the machine selection. Underfloor heating, larger radiators, and low-temperature fan coils all respond differently as the flow temperature falls.
Comparing the common options
Emitter type | Output at 35°C ΔT (W/m) | Output at 45°C ΔT (W/m) | Output at 55°C ΔT (W/m) |
|---|---|---|---|
Low-temperature underfloor heating | 40 to 80 | 60 to 100 | 80 to 120 |
Oversized Type 22 radiator | 90 to 140 | 130 to 190 | 180 to 260 |
Cast-iron column radiator | 70 to 120 | 100 to 160 | 140 to 220 |
Low-temperature fan coil | 150 to 300 | 200 to 380 | 260 to 450 |
These are approximate design ranges, not product guarantees. Actual output depends on emitter size, water-side conditions, room conditions, and the manufacturer's catalogue data. Final selection still needs to be checked against the room-by-room heat-loss table, and against the guidance used by MCS installers when they size a system for a lower-temperature retrofit.
What tends to work in real retrofits
In Wandsworth, Richmond, and Merton, the cleanest answer is often a mixed system. A rear extension or new family room can take underfloor heating, while older rooms keep or upgrade to larger Type 22 radiators. That combination lets the house run on cooler water overall without forcing every room into the same emitter type. It also reflects the practical reality of phased work, especially where one part of the house is easier to open up than another.
Heritage homes need a more careful conversation. Original cast-iron column radiators can sometimes stay in place if more sections are added, but visible changes can run into conservation resistance. That discussion needs to happen early, because it shapes both the room layout and the mechanical design. A radiator that looks acceptable in the room may still be too small once the heat-loss table is checked. For projects where the fabric strategy is still being set out, the approach outlined in this guide to building an eco-friendly house is a useful reminder that envelope, emitters, and plant size need to be considered together.
Domestic hot water matters too
Hot water does not disappear from the sizing exercise. A 300-litre cylinder at 45°C flow needs a longer compressor runtime than one at 55°C, so the lower-temperature approach can push the minimum output sizing upward if domestic hot-water demand is high. That does not mean every home should chase higher-temperature water. It means the cylinder strategy and the heat-pump strategy need to be set together, especially in family houses where morning demand can be unforgiving.
If you are reviewing a proposal, ask for the radiator schedule and compare it directly with the room losses. If the catalogue and the load table do not line up, the design is not finished.
Fabric-First Sequencing in Phased Refurbishments
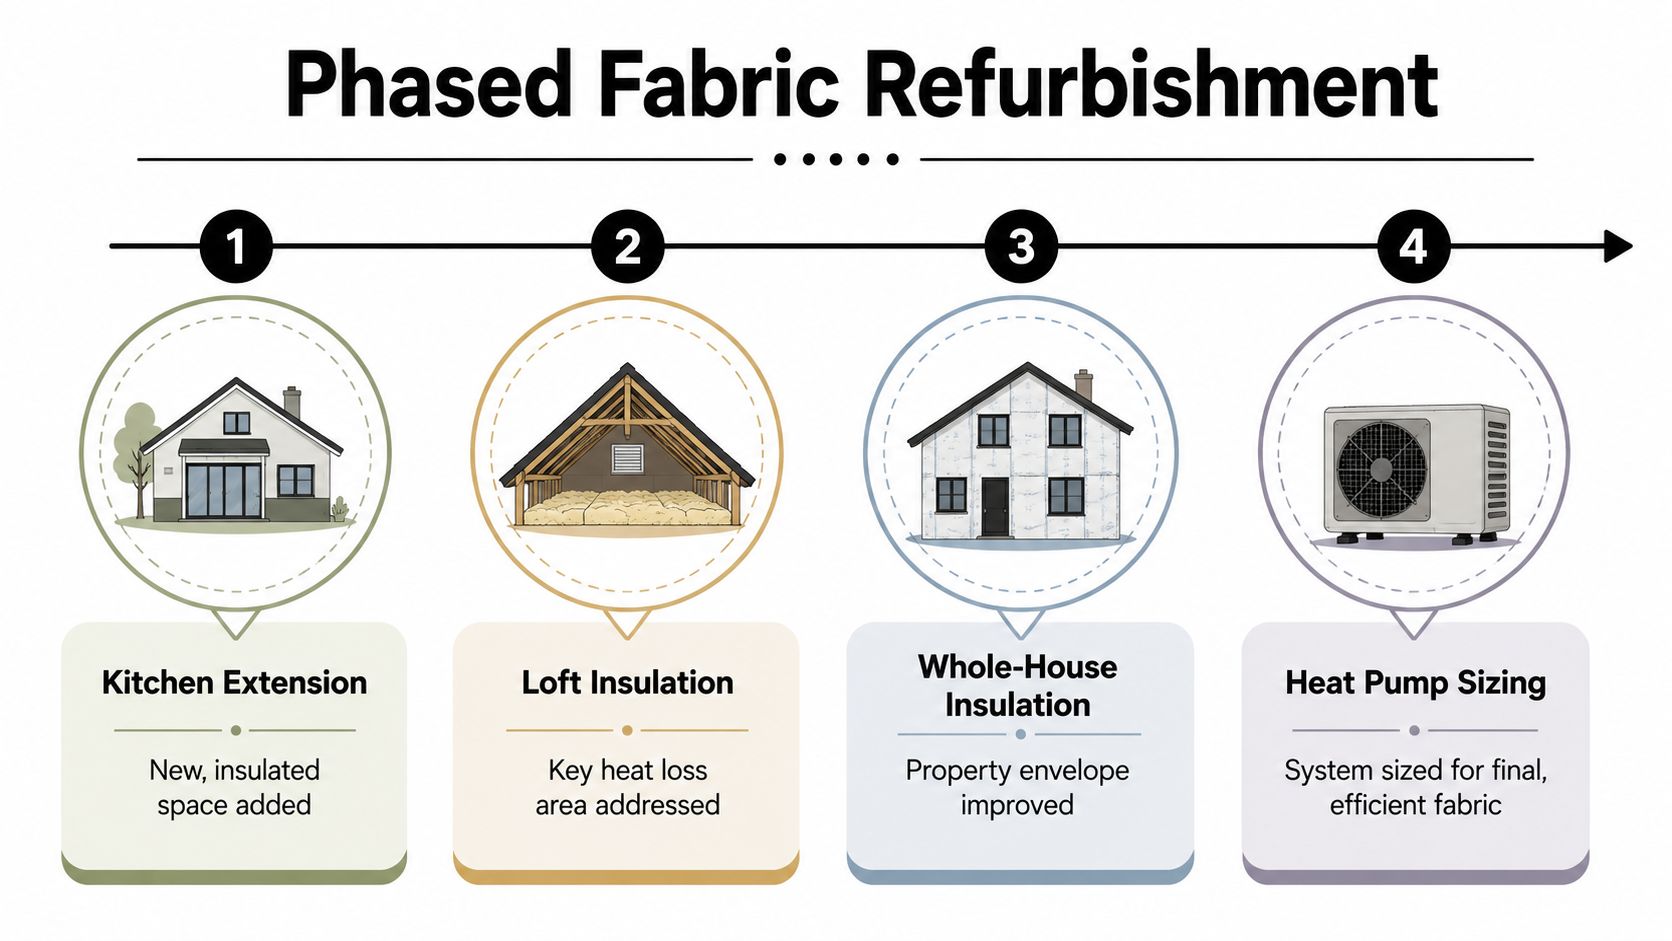
A phased retrofit rarely arrives in one clean package. In South West London, the kitchen extension is often first, the loft follows, then the windows, then insulation, then the plant room once the budget catches up. That order is exactly where air source heat pump sizing can drift off course if the design team treats each phase as separate.
Why today's load can be the wrong target
Sizing to the current heat loss can leave you with a larger, less efficient unit than the house will need after the fabric works are complete. Sizing to the final figure too early creates the opposite problem, because the house can feel underheated while the interim works are still unfinished. That is the sequencing trade-off in a phased refurbishment, and it matters most in family houses where the work is spread across several years.
The practical route is to reduce heat loss first and size to the building's actual demand, as the Energy Saving Trust guidance recommends and as MCS-aligned practice expects. In a phased project, the emitters and the flow temperature should be designed for the final fabric, then the heat pump should be selected so it can meet the design load once the envelope work is done. During the transition, some temporary backup heat or a short-term domestic hot-water compromise may be unavoidable, but it should be a conscious bridge, not the permanent arrangement. NEEP sizing guidance
Practical rule: if the fabric is changing, the heat pump schedule should change with it.
A Wimbledon example
Take an Edwardian villa in Wimbledon with external wall insulation planned for a later phase. The easy mistake is to buy for today's leakage and call it safe. That often produces a machine that is too large once the envelope is improved.
A better approach is to agree the final emitter strategy, the intended flow temperature, and the likely post-retrofit load at the outset. Then the fabric works can be staged so roof insulation, draught-proofing, and any secondary glazing on listed elevations are in place before the heat pump is commissioned. In conservation areas, planning limits can constrain external insulation to certain façades, so the design has to work with what is visibly acceptable as well as what is thermally preferable.
For anyone setting out that kind of phased project, this note on building an eco-friendly house is a useful reminder that fabric and plant need to be coordinated, not treated as separate decisions.
The grant and the planning reality
The Boiler Upgrade Scheme makes the heat pump decision feel more immediate, but the grant does not remove the need for sequencing discipline. If the building is still moving through major envelope changes, the final size should be based on the condition the house is heading towards, not the messier interim phase. That is especially true where conservation restrictions limit façade work and the retrofit has to be worked through room by room.
Working with MCS Installers and Planning Constraints
A heat pump project stands or falls on the paperwork and the sequence behind it. By the time the installer is ready to commit, there should be a heat-loss document, an emitter schedule, a control strategy, a commissioning plan, and a clear post-install performance check. As noted earlier in the sizing guidance, the load needs to be calculated properly and the chosen equipment should be matched to that load, rather than guessed from the old boiler size.
Planning can alter the mechanical layout
In South West London conservation areas, air-source heat pumps need careful siting. The practical aim is to keep noise below 42 dB(A) at the boundary, and listed-building consent may be triggered by external condenser positions, wall fixings, or new flue routes. Heritage officers often prefer the unit tucked beside an outbuilding or hidden behind a parapet, which can lengthen pipe runs and affect hydraulic separation.
That is why the architect and the installer should speak early, ideally before planning submission. If the condenser can only sit in one discreet corner, the hydraulic schematic and the pipework route should be shaped around that reality from the start. Retrofitting the location later is where costs and delays appear.
The same discipline applies to MCS paperwork. The installer needs to show that the selected unit, controls, and emitters all match the calculated load, and that the commissioning approach has been thought through. If you want a sense of how that coordination works in practice, this installation note is a useful parallel.
What to brief and what to share
Brief the designer: share room plans, window schedules, insulation upgrades, and any conservation constraints.
Brief the installer: provide the room-by-room heat loss, emitter plan, and the preferred flow temperature.
Brief planning early: flag the condenser location, visual impact, and any boundary noise sensitivity.
Specify clearly: include the target design temperature, domestic hot-water strategy, and who owns the final commissioning sign-off.
A careful site strategy can save a project that would otherwise be forced into a poor mechanical compromise just to satisfy a planning condition.
Avoiding the Sizing Mistakes That Haunt Retrofits
The biggest heat pump mistake is still the oldest one. Bigger feels safer, especially when a project is already dealing with tight plant space, old radiators, and conservation limits. For air source heat pumps, that instinct often works against the building.
The traps worth avoiding
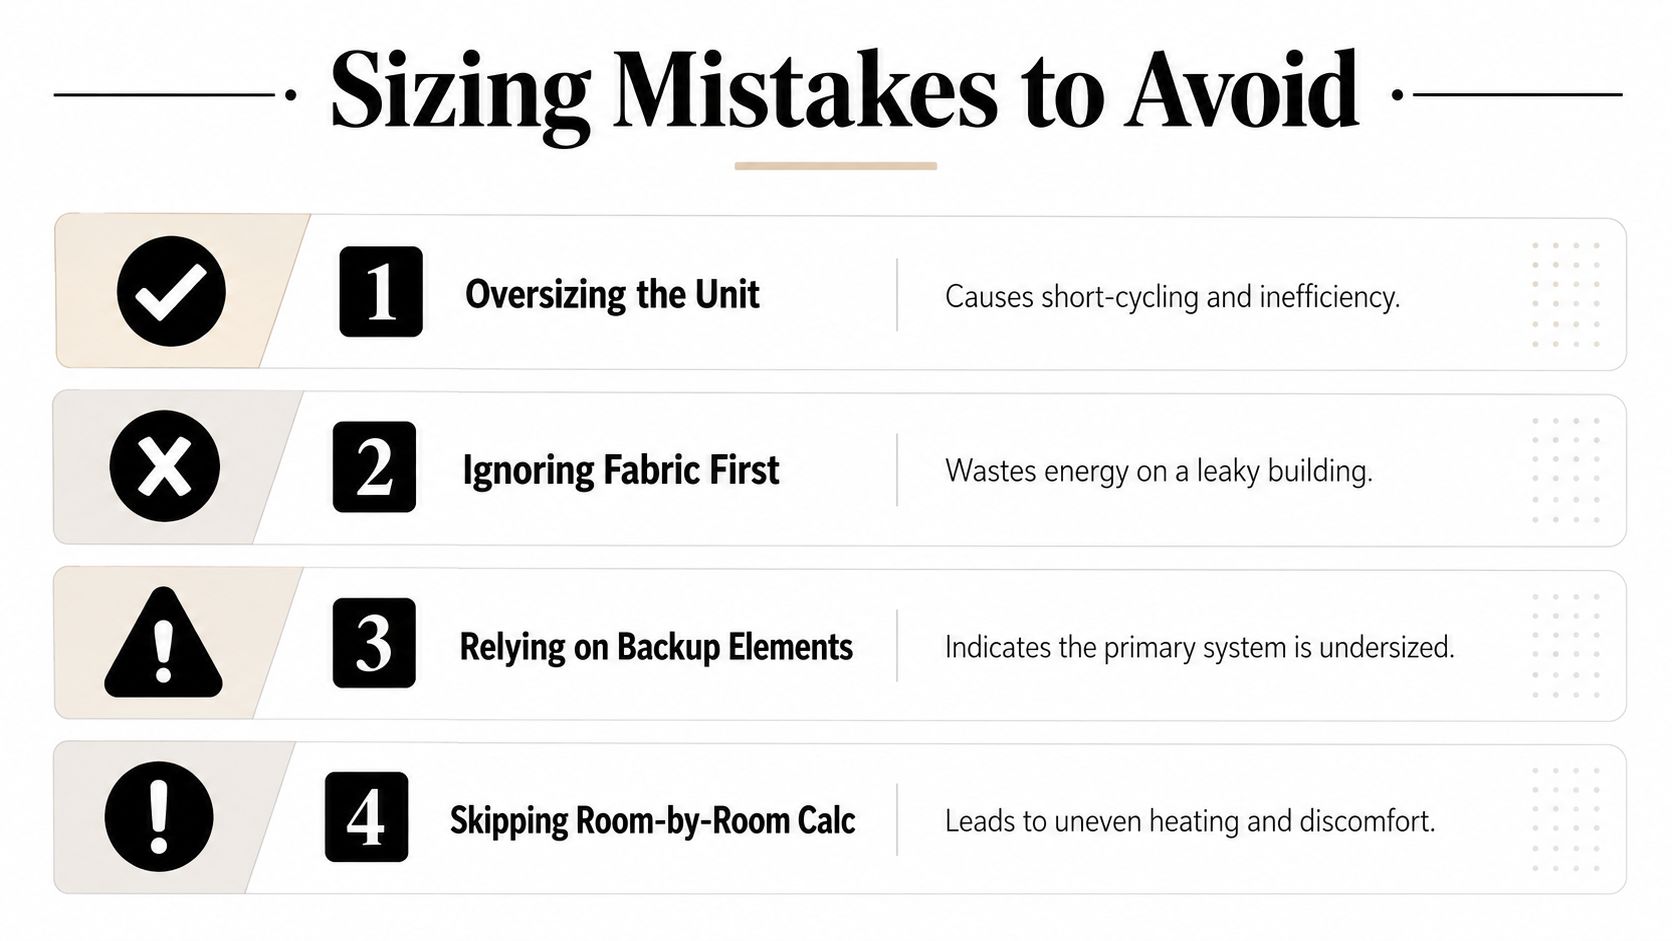
Oversizing sounds prudent, but it can cause short cycling in shoulder seasons and make weather compensation less effective. The unit starts and stops too often, which is hard on the compressor and leaves the system running outside its best range. Undersizing creates the opposite problem, pushing the house toward immersion backup or another auxiliary heater and weakening the carbon-saving case because the main plant no longer carries the load on its own.
As the PNNL guidance notes, the right selection depends on the capacity the unit can deliver at design temperature, not just the headline output on a brochure. Per the CEE sizing considerations, the installer should calculate the loads properly, check the heating and cooling duties, and select equipment to suit those loads rather than fall back on boiler-era habits.
There are other mistakes that show up in houses across Wimbledon and Surrey:
Ignoring domestic hot water: The cylinder and reheat strategy need to be sized with the heating plant, not added at the end.
Undersizing the cylinder: A heat pump only delivers useful hot water if the storage and coil arrangement suit the intended flow temperature.
Mixing flow temperatures on a hybrid system: If different parts of the house need different temperatures, the control logic has to be set up properly.
Future-proofing for an extension that may never happen: It is easy to pay for capacity you never use. If the extension is not committed, the core plant should not be sized around it.
Questions to put to the installer
What capacity does the unit deliver at -3°C and my target flow temperature?
What is the minimum modulation, and will it avoid short cycling?
How large is the backup heater, and when does it switch on?
What is the domestic-hot-water reheat time with the proposed cylinder?
Those questions pull the discussion away from marketing language and back to performance. They also show whether the contractor is designing for the house or fitting a standard package.
Correct air source heat pump sizing is achievable in almost any house once the heat loss, flow temperature, and emitters are aligned. A competent MCS contractor should lead that conversation from the first visit.

Comments